Mandala - 3D Layered SVG Cut File: A Practical Guide to Getting Stunning Results Without the Common Pitfalls
There is something almost meditative about a perfectly layered mandala. The symmetry, the depth, the way light falls between the layers—it draws you in. When you work with a Mandala - 3D Layered SVG Cut File, you are combining digital precision with tactile craftsmanship. Whether you’re making wall art for your living room, selling finished pieces at a craft fair, or designing digital templates for other creators, the appeal is obvious. Yet many people end up frustrated with warped layers, misaligned pieces, or wasted material. The difference between a breathtaking result and a disappointing one often comes down to a few overlooked details. Let’s walk through the most common mistakes and, more importantly, how to avoid them so that every mandala you create looks like it belongs in a gallery.
What Exactly Is a Mandala - 3D Layered SVG Cut File?
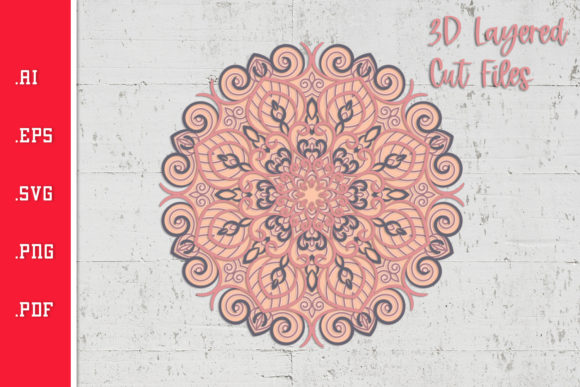
At its core, this is a digital vector file designed for cutting machines like Cricut, Silhouette, or Brother ScanNCut. The file contains multiple layers—often anywhere from three to fifteen or more—that are cut from different sheets of cardstock, paper, or other thin materials. When stacked with foam spacers or adhesive dots, the layers rise above one another, creating a three-dimensional effect. The mandala pattern itself, with its repeating radial geometry, becomes even more striking when each ring of the design sits at a different height. These files are typically sold through Etsy, Creative Fabrica, or designer websites, and they have become a favorite among crafters for gifts, home decor, and even wedding decor.
Common Mistake #1: Overlooking the Layer Count and Complexity
One of the first things many people look at is the image preview. It looks gorgeous, so they buy. What they don’t check is the number of layers. A design with fifteen layers might look amazing, but if you are new to 3D layering or only have a few colors of cardstock, you could be setting yourself up for trouble. Each layer needs its own sheet of material, its own cut time, and its own assembly step. A high layer count also increases the chance of misalignment if your machine’s registration is slightly off.
Better approach: Before you buy a Mandala - 3D Layered SVG Cut File, look at the layer breakdown. Many designers list the exact number of layers in the description. If you are a beginner, start with a file that has four to six layers. You can always upgrade to more complex designs as your skills and patience grow. Also check whether the design includes a solid base layer and a back layer—these are non-negotiable for stability.
Common Mistake #2: Ignoring File Format and Software Compatibility
SVG (Scalable Vector Graphics) is the standard, but not all SVG files are created equal. Some sellers include multiple formats, such as DXF, PNG, and EPS. However, the real issue is how your cutting software interprets the file. Cricut Design Space, Silhouette Studio, and other programs can sometimes misread paths, duplicate lines, or lose cut settings. I have seen people download a layered mandala SVG only to find that every layer opens as a single combined shape, making it impossible to separate them.
Better approach: Always read the file requirements in the product listing. Look for phrases like “tested in Cricut Design Space” or “Silhouette Studio compatible.” If you use a specific program, search for reviews from others who use the same software. When in doubt, message the seller. A reputable designer will confirm compatibility and may even offer a troubleshooting guide. Also, download a sample file if available. Nothing beats testing before you pay.
Common Mistake #3: Using the Wrong Material or Thickness
The 3D effect relies on the distance between layers. If you use thin printer paper for a design that expects 80lb cardstock, the layers will droop or bend. Conversely, using heavy chipboard with thin foam spacers can crush the adhesive and cause the layers to sit unevenly. The material choice affects not only appearance but also cutting quality—thin paper may tear, while thick cardstock can dull your blade faster.
Better approach: Check the recommended material in the product description. Many designers specify a weight range, such as 65lb to 110lb cardstock. If not, a safe starting point is 80lb cardstock for most layered mandalas. Also consider color: white or cream cardstock allows the shadows between layers to show clearly, but colored cardstock can create dramatic effects when the layers are different hues. Match the material to the depth of the foam spacers you plan to use—typical spacers are 1mm to 3mm thick. Thicker cardstock needs thicker spacers to maintain the depth.
Common Mistake #4: Skipping Test Cuts and Calibration
It sounds obvious, but many people load the file, hit “cut,” and hope for the best. A layered mandala relies on precise alignment—if the inner circle on layer 2 is a millimeter too large, it will show a gap when placed over layer 1. If your machine’s blade is slightly dull or the pressure is too low, you may end up with half-cut pieces that are impossible to weedit from mat.
Better approach: Always run a test cut on a scrap piece of the exact same cardstock you plan to use. Adjust cut pressure and blade depth until the shape cuts cleanly without cutting through the mat backing. Many cutting machines have a “test cut” button or a small square you can cut to check. For a Mandala - 3D Layered SVG Cut File, also test the alignment of two adjacent layers—cut them on different mats, then layer them with spacers to see if the edges line up. Yes, it takes a few extra minutes, but it saves you from ruining an entire set of cardstock sheets.
Common Mistake #5: Underestimating Assembly Time and Order
Here is where the real frustration hits. You have all the pieces cut, but you have no idea which layer goes where. The layers might be numbered in the file, but sometimes the numbers are tiny or the design uses letters instead. If you assemble in the wrong order, the mandala’s depth and symmetry break. I’ve seen people glue layer 7 directly on top of layer 1, losing the intended 3D effect entirely.
Better approach: Before you cut, open the file and note the intended assembly order. Some designers provide a PDF guide with a numbered diagram—print it and keep it next to your workspace. If not, create your own by arranging the layers in your software from bottom to top. After cutting, immediately label each piece on the back with a pencil (light markings won’t show through). Use a foam dot or adhesive square between each layer, starting from the base. Work slowly, starting with the center, and check alignment against a light source before pressing the layers fully together.
Common Mistake #6: Overlooking the Base and Shadow Layer
A common oversight is assuming that the bottom layer of the mandala is the “base.” In many 3D layered designs, there is actually a separate solid base layer that sits behind the entire mandala, plus sometimes a black or dark shadow layer that creates a contrast between the design and the base. Without these, the mandala can look flat or translucent, especially if you are using white cardstock on a white background.
Better approach: When evaluating a Mandala - 3D Layered SVG Cut File, verify that it includes a solid back layer and a shadow layer (usually a slightly larger duplicate of the mandala’s overall shape, cut from black or a dark color). If it doesn’t, consider making your own by creating a simple circle in your software that matches the outermost dimension. Attach this to a sturdy backing board (like a chipboard or matboard) for a professional finish. The shadow layer will make the mandala “pop” even in low light.
What to Check Before Buying a Mandala 3D Layered SVG Cut File
Now that you know the most common pitfalls, here is a quick checklist to run through before you hit “add to cart.”
- Number of layers – Does the design match your skill level and material stash?
- File format – SVG is standard, but check for DXF, EPS, or PNG for specific software.
- Size options – Is the file scalable? Can you resize without losing cut quality? Some SVGs are locked to a specific size.
- Preview images – Look for multiple angles showing the 3D depth, not just a flat mockup. Real photos of the finished piece are best.
- Assembly guide – Does the seller provide a PDF or video walkthrough? This is a strong signal of a quality design.
- License – If you plan to sell finished items, ensure the commercial use license is included. Many designers allow it but with restrictions on the number of sales or the need to credit the designer.
- Customer support – Read recent reviews to see if the seller responds to questions. A helpful seller is worth extra.
A Better Overall Approach to 3D Layered Mandalas
The best results come from treating each Mandala - 3D Layered SVG Cut File as a small project in its own right. Start with one design that you love, invest in quality cardstock, and take the time to calibrate your machine. Keep a notebook where you note which settings worked for each paper type. When you assemble, use good lighting and a flat surface. And if the first attempt isn’t perfect, don’t toss it—experiment with the layers to create something new. Maybe flip the order, or use a negative space as a stencil. The flexibility of SVGs means you can iterate without starting from scratch.
Once you develop a workflow, you will find that 3D layered mandalas become one of the most rewarding projects in paper crafting. They make thoughtful gifts, impressive wall art, and even teach you a bit about geometry and light. By avoiding the common mistakes, you skip the frustration and jump straight to the joy of seeing that final layer click into place.