3D Layered Halloween SVG and 3D Pumpkin SVG: A Practical Guide for Better Results
If you have browsed craft marketplaces or design platforms lately, you have likely come across 3D Layered Halloween SVG and 3D Pumpkin SVG files. These digital designs allow you to create dimensional, eye-catching decorations, cards, apparel, and home accents using cutting machines like Cricut or Silhouette. Instead of flat, single-layer graphics, these files stack multiple cut layers to produce depth, shadow, and a realistic three-dimensional effect. The appeal is obvious: you get a professional, almost sculptural look from materials like cardstock, vinyl, or even basswood. But jumping in without understanding the nuances can lead to wasted materials, frustration, and results that fall short of expectations.
What These Files Actually Are and Why People Want Them
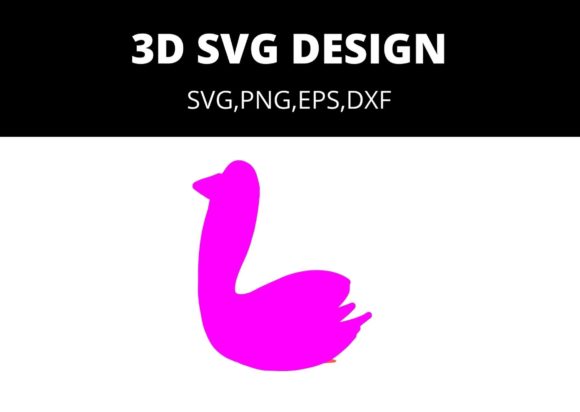
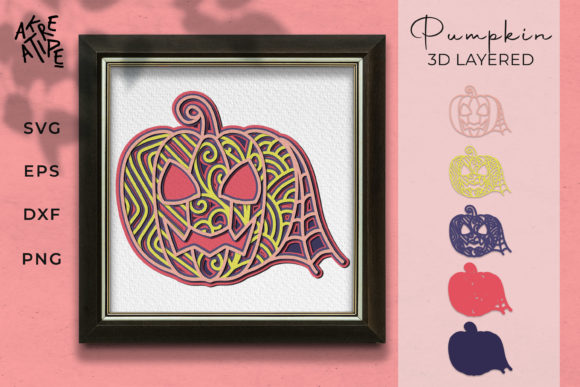
A 3D Layered Halloween SVG is a vector file containing separate layers for each depth plane of a design. For example, a haunted house scene might include a back layer with a full moon, a middle layer with the house silhouette, and a front layer with pumpkins and bats. When cut from different colored cardstock and stacked using foam adhesive, the layers physically separate, creating a shadow box or layered art piece. A 3D Pumpkin SVG works on the same principle but focuses on pumpkin shapes, often with ribbed textures, stems, leaves, and internal cutouts that simulate carving. Interest in these files peaks around September through November, but savvy creators use them year-round for Halloween-themed parties, seasonal markets, and content creation.
The appeal goes beyond aesthetics. These files offer a fast path to high-value finished products that sell well at craft fairs or on Etsy. For hobbyists, they provide a satisfying project that looks complex but becomes manageable with the right approach. For educators and bloggers, they serve as engaging tutorial material. Yet many people download a file, load it into their cutting software, and immediately encounter problems that could have been avoided with a bit of foreknowledge.
Common Mistake: Ignoring Layer Count and Complexity
One of the most frequent errors is choosing a file based solely on its preview image without checking the layer count. A 3D Layered Halloween SVG with eight or more layers creates stunning depth, but it also demands more material, more cutting time, and more patience during assembly. If you are new to layered crafting, starting with a five-layer design is far more practical. I have seen beginners purchase intricate twenty-layer haunted village files, only to abandon the project halfway through because they underestimated the effort. The result is not only wasted money but also discouragement that keeps people from trying again.
What to check before buying: Look for the layer count in the product description. If it is not listed, message the seller or skip the file. For your first project, aim for three to five layers. This gives you enough depth to learn the stacking technique without overwhelming you. Also confirm that the file includes a reference image or assembly guide. Good sellers provide a diagram showing which layer goes where. Without that, you are guessing, and guessing leads to misaligned layers and frustration.
Overlooking Material Compatibility
Another mistake that undermines results is using the wrong material for the layer depth. A 3D Pumpkin SVG designed for cardstock will not cut properly from 1.5 mm basswood unless you adjust knife blade settings and possibly the design itself. Conversely, using thin cardstock for a file intended for chipboard will result in flimsy layers that collapse under their own weight. Material choice directly affects the final quality, durability, and even the perceived value of the finished piece. If you plan to sell your creations, flimsy layers look cheap and reduce customer satisfaction.
Better approach: Before downloading a 3D Layered Halloween SVG, read the recommended material list. Most designers specify the ideal cardstock weight, often between 65 lb and 110 lb. If you want to use heavier materials like craft plywood, search specifically for files labeled as chipboard-ready or multi-material. When in doubt, test a small cutting area first. Cut one layer from your intended material, assemble it temporarily, and assess whether the thickness and stiffness work. This small step saves entire sheets of expensive material.
Misunderstanding Layer Order and Orientation
A subtle but costly mistake involves misreading the layer order in the cutting software. Many 3D Layered Halloween SVG files arrive with layers stacked from back to front, but some designers arrange them in reverse or use color codes that differ from your software defaults. If you cut the layers in the wrong order, you might trim away parts that should stay intact, ruining the design. I have seen creators cut the front layer first, only to realize the back layer had intricate internal cutouts that needed to remain solid. By that point, the material is already cut incorrectly.
Practical advice: When you open the file in your cutting software, take two minutes to rearrange layers visually. Most programs allow you to hide layers temporarily or change their order. Compare the software preview with the seller's reference image. If something looks off, check the layer names. Designers often name layers as Layer 1 (back), Layer 2, and so on. If the names are missing or unclear, use the software's color mapping tool to assign different colors to each layer. This gives you a visual map of what cuts where. Following this habit prevents wasted material and ensures the assembly matches the intended design.
Neglecting Foam Adhesive Thickness and Alignment
Even if the cuts are perfect, poor assembly can flatten the dimensional effect. A 3D Pumpkin SVG relies on foam adhesive squares or strips to separate layers. Using adhesive that is too thin collapses the depth, making the pumpkin look nearly flat. Using adhesive that is too thick can cause layers to warp or tilt, especially if the design has large unsupported areas. Another issue is misalignment during stacking. If you place the foam tape even slightly off, the layers will shift, creating an uneven edge that ruins the crisp silhouette.
How to avoid this: Choose foam adhesive with a thickness between 1 mm and 3 mm for standard cardstock projects. For larger 3D Layered Halloween SVG designs with wide open spaces, use strips rather than small squares to provide even support. When stacking, start from the back layer and work forward. Place the design on a light table or hold it up to a window before pressing the layers together—this lets you see alignment marks or edges. If your file includes registration marks, use them. If not, cut a small notch in the same spot on each layer as a manual alignment guide. This extra step takes seconds but dramatically improves precision.
Ignoring File Format and Software Compatibility
A 3D Layered Halloween SVG might come in SVG, DXF, PNG, or EPS formats. Not all cutting machines handle every format equally. SVG is the most versatile, but some users download a PNG version and try to convert it themselves, resulting in poor cut lines and jagged edges. This is especially common with 3D Pumpkin SVG files that have curved, organic shapes—conversion artifacts destroy the smoothness that makes the pumpkin look realistic. The time spent cleaning up vector paths could be better spent actually crafting.
Better decision: Stick to native SVG files unless you are experienced with vector editing software like Inkscape or Adobe Illustrator. Before purchasing, check that your machine and software support SVG import. Cricut Design Space, Silhouette Studio, and Make the Cut all handle SVG well, but older versions may struggle with certain features. If you are unsure, look for sellers who offer multiple formats in one download. That way you have options if your preferred format fails. Also avoid free files from unverified sources—they often contain hidden errors like open paths, missing layers, or incorrect scaling that cause cutting failures halfway through a project.
Skipping the Test Cut Step
This single oversight causes more wasted material than any other mistake. You have a beautiful 3D Layered Halloween SVG, you load high-quality cardstock, you hit cut, and then the blade drags through a layer that should have remained intact, or the paper shifts mid-cut, or the pressure is wrong and the design does not separate cleanly. All of that could have been caught with a miniature test cut. A test cut takes two minutes and one scrap piece of material, yet many creators skip it because they are eager to see the final result.
Practical habit: Before cutting any layer of your 3D Pumpkin SVG or layered Halloween design, cut a small test shape from the same material. Use a simple circle or square, or cut a small detail area from the actual file if your software allows it. Check that the blade depth, pressure, and speed produce a clean cut without tearing. If the test fails, adjust settings and test again. This is especially important when working with new materials or blade types. Once your test passes, you can confidently cut the full set of layers. This approach saves material, time, and frustration, and it ensures that the dimensional effect you worked for is not compromised by avoidable cutting errors.
What to Check Before Making a Decision
Before buying a 3D Layered Halloween SVG or 3D Pumpkin SVG, review these points to avoid regret. Check the layer count against your skill level and available time. Verify material recommendations and confirm you have the right stock on hand. Look for assembly guides or reference images in the listing—without them, you are flying blind. Confirm file format compatibility with your software version. Read seller feedback specifically about file quality and ease of assembly, not just overall star ratings. Finally, ensure the design has a proper license for your intended use. Many sellers permit personal and small business use but restrict commercial sales of the finished product. If you plan to sell your crafts, a commercial license is essential. Skipping this step can lead to legal issues or removal from marketplace platforms.
3D Layered Halloween SVG and 3D Pumpkin SVG files open up a creative world that combines digital design with hands-on crafting. They reward preparation, patience, and attention to detail. By avoiding the common missteps around layer complexity, material choice, assembly technique, and software handling, you set yourself up for satisfying results every time. The difference between a mediocre layered project and a stunning one often comes down to the small decisions made before the blade touches the material. Take those decisions seriously, and your finished pieces will speak for themselves.